
Interior design transformations often begin with ceiling attention. What seems an insurmountable architectural challenge—flat, uninteresting overhead surfaces—finds elegant solution in faux wood beam installation. These lightweight, manufactured products deliver the warmth and character of timber without demanding structural engineering or specialized carpentry skills. This guide introduces everything first-time buyers need to know for successful project completion.
Understanding Faux Wood Beam Materials
Polyurethane Composite Options
Polyurethane faux beams represent the most common category, offering balanced characteristics for most residential and commercial applications. These products cast from liquid polyurethane formulations into molds that capture detailed wood grain surfaces. Density varies by manufacturer, affecting weight, durability, and surface detail reproduction.
Benefits of polyurethane include consistent quality control during manufacturing, light weight that simplifies handling and installation, and formulation flexibility that enables various densities and performance characteristics. The material accepts stains, paints, and sealants designed for wood substrates.
Alternative Material Categories
High-density polyurethane foam offers similar appearance to composite alternatives at potentially lower cost, though surface durability may differ. Fiberglass-reinforced products provide enhanced structural capability for applications requiring fastener retention or load bearing. Metal-core beams incorporate structural steel within hollow polyurethane shells, combining authentic appearance with genuine structural capability.
Material selection depends on specific project requirements including load expectations, fastener requirements, environmental conditions, and budget constraints. Most residential ceiling applications perform adequately with standard polyurethane products.
Determining Appropriate Beam Sizing
Measuring Your Space
Successful beam installation requires accurate dimensional planning. Begin by measuring ceiling length in the beam installation direction. Account for any obstacles—light fixtures, ceiling fans, HVAC registers—that beam installation must accommodate or avoid.
Ceiling height influences beam dimension selection. General guidance suggests beam width should fall between one-twelfth and one-sixth of ceiling height. An eight-foot ceiling (96 inches) accommodates beams six to sixteen inches wide. Taller ceilings accept proportionally larger beams without appearing overbearing.
Room proportions matter equally. Long, narrow rooms benefit from beams running across the narrow dimension to create apparent width. Square rooms accept beams in either orientation, though parallel-to-wall alignment often appears more intentional than diagonal installation.
Standard Size Ranges
Residential applications typically employ beams from four to twelve inches wide, with depths ranging from three to eight inches. Commercial and hospitality installations may specify larger dimensions—fourteen to twenty-four inch widths—to match grander scales.
Length availability varies by manufacturer, with standard lengths typically ranging from eight to twenty feet. Longer spans may require intermediate support or splicing techniques that join multiple beam sections invisibly.
Mounting Method Options
Surface Mounting Basics
Surface mounting attaches beams directly to ceiling surfaces using brackets, adhesives, or a combination. This approach works well when ceiling structure provides adequate holding power and appearance allows visible mounting hardware.
Bracket mounting uses metal connectors that fasten to ceiling structure and engage beam hollows. This method provides secure attachment while remaining invisible from normal viewing angles. Bracket selection should match ceiling structure type—wood joists, trusses, or concrete substrates require different hardware.
Adhesive mounting applies construction adhesive between beam back surfaces and ceiling. This approach eliminates visible hardware but requires very clean, rigid mounting surfaces. Adhesive alone may not provide adequate holding power for heavy beams or in earthquake-prone regions.
Suspended Mounting Systems
Suspended mounting uses aircraft cables or threaded rods from overhead structure to support beams at specified heights below ceiling planes. This approach creates floating effects where beams appear unsupported, adding visual interest through unexpected appearance.
Suspended systems require structural elements capable of supporting beam weight plus hardware. Ceiling joists, trusses, or structural slabs provide attachment points. Installation requires accurate measurement and adjustment to achieve consistent suspended heights.
Furring and Framework Preparation
Flat ceilings may require furring strips—wood or metal strips attached perpendicular to ceiling joists—to create mounting surfaces aligned with beam positions. This framework provides attachment points where ceiling surfaces offer insufficient holding power or where beam positions do not align with structural elements.
Furring installation requires consistent spacing and alignment to prevent beam misalignment that would reveal framework presence. Professional installation ensures framework installation precedes beam delivery and fitting.
Finish Selection and Customization
Pre-Finished Options
Factory-finished beams arrive with stains, paints, or sealants already applied. This approach simplifies installation by eliminating on-site finishing, though finish selection occurs before measurements confirm site conditions. Pre-finished products suit projects where standard colors satisfy design requirements.
Advantages include controlled application conditions, consistent finish quality, and reduced installation site mess. Disadvantages include limited customization options and potential damage during installation requiring touch-up.
Site Finishing Approaches
On-site finishing provides maximum flexibility for color matching and creative effects. Beams arrive primed or raw, allowing custom stain matching to adjacent materials or artistic finishing techniques impossible in factory environments.
Site finishing extends project timeline but enables adjustment based on actual site conditions. Custom color matching to existing trim, flooring, or furniture becomes possible. Weathering effects, distressing, and decorative treatments expand design vocabulary beyond standard finishes.
Popular Finish Styles
Natural wood stains in honey, golden oak, and walnut tones provide classic warmth suitable for traditional and transitional interiors. Whitewash and graywash finishes suit coastal, farmhouse, and contemporary aesthetics. Painted white or black beams create graphic statements that coordinate with bold color schemes.
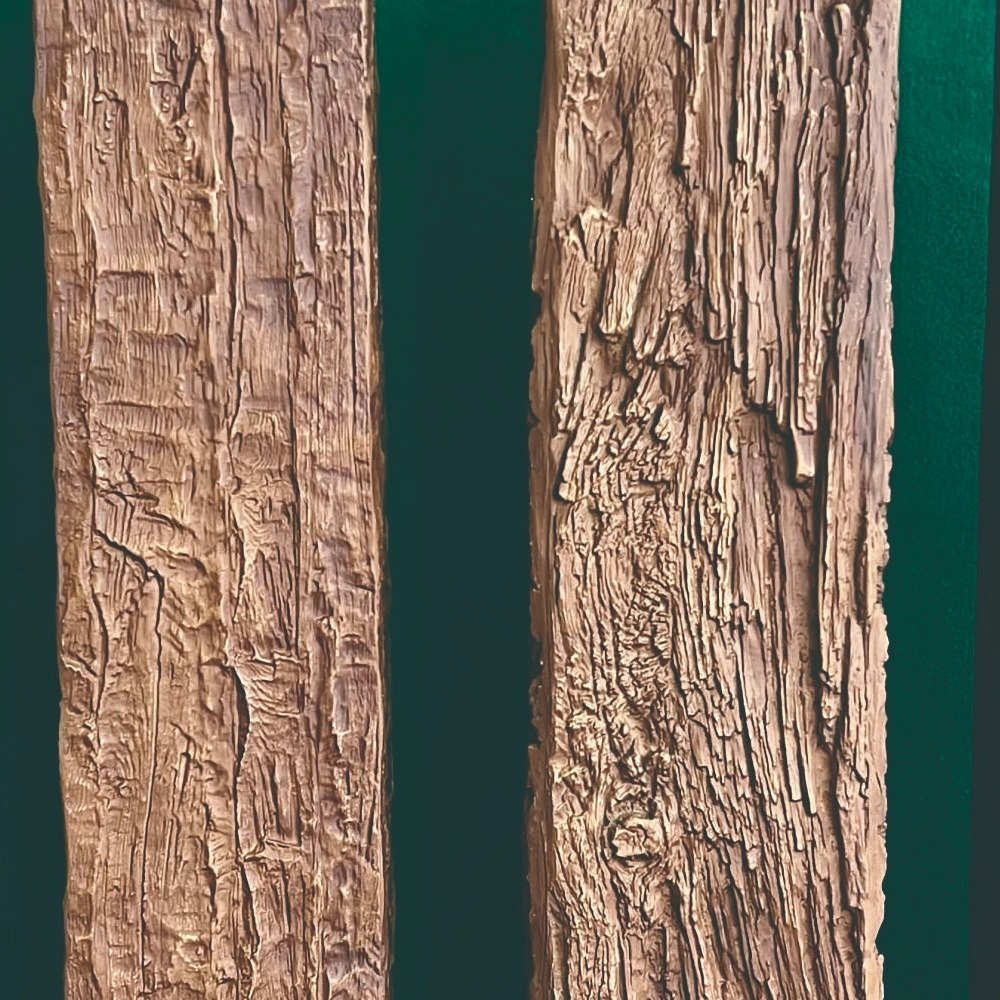
Reclaimed wood reproductions feature intentionally weathered appearances with visible age marks, fastener holes, and oxidation patterns. These finishes complement industrial, vintage, and rustic design directions.
Step-by-Step Installation Process
Planning and Preparation
Installation success begins with thorough planning. Create detailed drawings showing beam positions, lengths, and junction treatments. Verify that mounting hardware selections match ceiling structure and beam specifications. Confirm that beam lengths account for any necessary cuts and that mitered ends align correctly.
Prepare installation sites by cleaning mounting surfaces and repairing any damage that might affect holding power. Mark beam positions using chalk lines or laser levels that ensure accurate alignment. Dry-fit beams before applying adhesive or permanent fasteners to identify any adjustment requirements.
Structural Attachment
Begin attachment at beam ends, securing initial connection points before addressing intermediate support. Use levels to verify alignment as each beam installs, making adjustments before completing attachment sequences. Maintain consistent spacing between parallel beams throughout installation lengths.
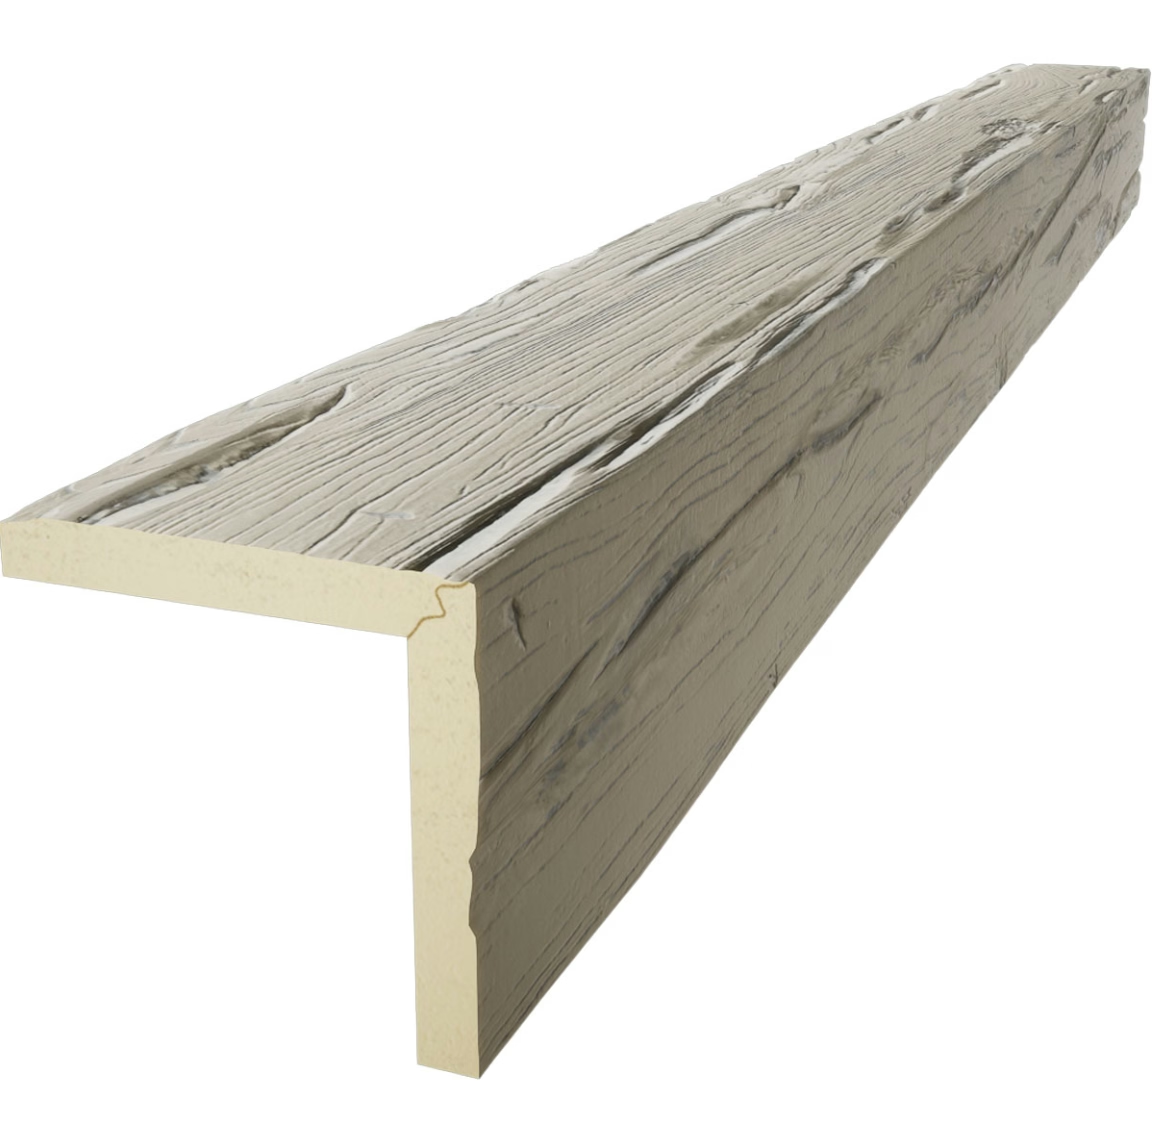
Corner installations require careful miter cutting or scarf joint formation. Practice cuts on scrap material confirm technique before committing to finished beams. Factory-mitered corners from beam manufacturers often provide superior results for complex intersections.
Finishing and Detailing
Seal beam joints and connection points using color-matched wood filler or caulk designed for the specific finish type. Sand any surface damage lightly before applying touch-up finish. Remove protective packaging carefully to avoid finish damage at edges.
Final inspection verifies consistent alignment, secure attachment, and satisfactory appearance from normal viewing positions. Address any deficiencies before project completion, documenting successful completion for warranty purposes.
Common Mistakes to Avoid
Measurement Errors
The most common installation problems trace to measurement mistakes. Always measure twice before cutting, accounting for miter angles that reduce effective length. When measuring for multiple beams, verify that measurements reference consistent points rather than assuming parallel surfaces are identical.
Spanning measurements must account for clearance requirements and mounting hardware dimensions. Beam end cuts for corners require accounting for both depth and angle simultaneously.
Inadequate Support Planning
Beams require adequate structural support at specified intervals, typically every four to six feet depending on beam weight and mounting method. Inadequate support leads to sagging over time, visible misalignment, and potential failure. Verify support availability before purchasing beams with specific spacing requirements.
Finish Color Mismatches
Adjacent materials should complement rather than compete with beam finishes. Request finish samples before purchase commitment, comparing samples against actual adjacent materials under project lighting conditions. Computer monitor representations often differ significantly from actual finishes.
Professional Versus DIY Installation
Assessing Your Capabilities
DIY installation suits property owners comfortable with basic carpentry tools and comfortable working at heights. Essential skills include accurate measuring, straight cutting, level use, and secure fastening. Projects with complex layouts, high ceilings, or structural complications may benefit from professional installation.
Consider access requirements honestly. Extension ladder work on high ceilings challenges even experienced installers. Projects requiring scaffolding or lift equipment often prove more cost-effective when professionals handle specialized access equipment.
Finding Qualified Installers
Professional installation services range from general contractors experienced with finish carpentry to specialty companies focusing exclusively on faux beam installation. Request references and portfolio examples before commitment. Verify insurance coverage adequate for project scale and complexity.
Installation quotes should itemize labor, materials, and any subcontracted work. Clarify responsibility for material procurement, site preparation, and finishing touch-ups before contracts execute.
Maintenance and Care
Faux wood beams require minimal ongoing maintenance compared to genuine timber. Regular dusting or gentle vacuuming removes accumulated debris from textured surfaces. Occasional washing with mild detergent solutions addresses accumulated residues.
Inspect attachment points periodically for any loosening that might develop. Address any finish damage promptly to prevent moisture infiltration or UV exposure from accelerating deterioration.
The investment in careful planning and patient installation rewards property owners with ceiling transformations that enhance living environments while supporting property values. Faux wood beams offer accessible paths to architectural sophistication that earlier generations achieved only through expensive structural timber installations.
Technical References
ASTM standards cited in every specification
Test Data
Lab results from internal testing program
Updated 2026
Reviewed against current product specs


