Older homes frequently present challenges that newer construction avoids: beams that were adequate for original construction but now appear dated, damaged, or inconsistent with updated interiors. Complete beam removal typically requires structural engineering assessment, temporary support installation, and significant construction disruption. Three-sided PU resin faux wood beam casings offer an alternative that respects existing structure while achieving transformed aesthetics. The casing approach preserves structural function while creating entirely new visual appearances.
The terminology distinction between beams and casings carries practical significance. A beam carries structural loads; a casing merely covers. This fundamental difference shapes every aspect of product design, from wall thickness to mounting methodology. Casings prioritize visual impact over load-bearing capacity, enabling lighter construction and simpler installation. Understanding this distinction helps professionals and homeowners communicate effectively with suppliers and installers, ensuring appropriate product selection for specific project requirements.
Technical Characteristics of PU Resin Construction
Polyurethane resin beams represent an evolution beyond earlier faux beam technologies that relied on fiberglass, plaster, or medium-density fiberboard. PU resin offers superior impact resistance, finer surface detail, and better dimensional stability than these alternatives. The material accepts molded textures with remarkable fidelity, capturing wood grain patterns at microscopic scales that read as authentic weathering when viewed from normal distances. This texture accuracy distinguishes premium products from budget alternatives that display obvious artificial regularity.
The chemical composition of quality polyurethane includes UV inhibitors that resist the yellowing and surface degradation that plagued earlier synthetic beam materials. This UV resistance extends product lifespan significantly, particularly in spaces receiving substantial natural light through skylights or clerestory windows. Beams installed in dimmer interior spaces without UV exposure typically maintain original appearance indefinitely, while even brightly lit installations routinely exceed fifteen years before any visible degradation becomes apparent.
Weight reduction compared to wood approaches ninety percent in many configurations, transforming what would require equipment-assisted installation into manageable hand-lifting. This weight advantage proves decisive in applications where ceiling structure cannot support significant additional loading. Historic renovations benefit particularly, as original construction often lacks the structural reserve that modern building codes require. Three-sided casings add negligible load while delivering dramatic visual transformation that solid wood alternatives would prohibit.
Assessment and Planning for Existing Beam Coverage
Evaluating existing beams before casing installation requires systematic inspection of current conditions. Identify the beam material—dimensional lumber, engineered lumber, or original structural timber—as this affects both mounting method selection and any preparatory work required. Measure existing beam dimensions precisely, recording width, depth, and any variations along the beam's length. Out-of-square conditions, crowning, or warping may require custom fabrication or additional shimming during installation.
Structural assessment determines whether beam casings represent an appropriate solution. Visible damage including cracks, sagging, insect damage, or water staining warrants closer examination before proceeding. In some cases, the existing beam requires reinforcement or replacement before casing installation. An experienced contractor or structural engineer can evaluate whether current conditions support casing installation or indicate more serious concerns requiring remediation. This assessment represents a modest investment that prevents costly problems after installation completes.
Clearance requirements around existing beams affect casing size selection and installation approach. Three-sided casings need sufficient space to slide over existing beams without forcing or modification. Measure all available clearances—above beam ends, at wall intersections, around any projecting hardware or electrical fixtures. Also verify that any utilities running along or through existing beams can be accessed after casing installation, or plan for accessible panels or removable sections if ongoing access proves necessary.
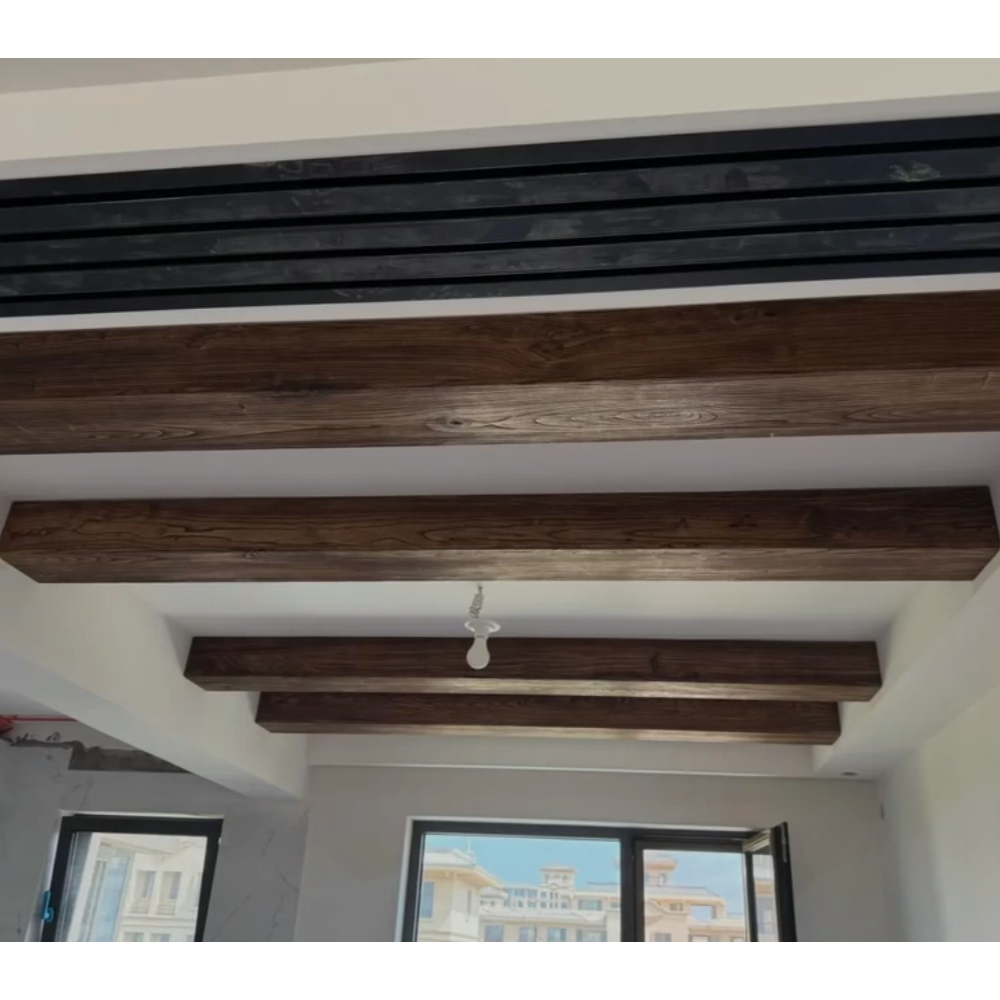
Installation Methodology and Sequence
Proper installation of three-sided casings follows a logical sequence that prevents problems during and after installation. The first stage involves thorough surface preparation of the existing beam. Clean the beam surface completely, removing dust, debris, oil, or anything that might compromise adhesive bonding. Any rough patches should be smoothed, and gaps or voids filled with appropriate patching compound. Allow repairs to cure completely before proceeding.
Dry-fitting represents an essential stage that many DIY installers attempt to skip. Temporarily position casings over existing beams without adhesive to verify fit, alignment, and appearance. This practice fitting reveals any clearance issues, alignment problems, or dimensional mismatches before adhesive application makes corrections difficult. Mark reference lines on both the casing and existing beam to ensure accurate repositioning during final installation. Identify which end of each casing faces which direction—these pieces are directional, with texture patterns designed to flow in specific orientations.
Adhesive application requires attention to coverage and curing conditions. Apply construction adhesive in continuous beads across all contact surfaces within the casing, maintaining adequate thickness while avoiding excess that might squeeze out during installation. Position the casing carefully, using reference marks for alignment, and apply firm pressure across the entire surface to ensure complete adhesive contact. Mechanical fasteners supplement adhesive in most installations, driven through factory-drilled holes and into the existing beam or underlying structure. Allow adhesive to cure fully—typically forty-eight hours—before applying any finish stress to the installation.

Finishing and Detailing for Professional Results
The difference between amateur and professional installations often lies in finishing details. Factory finishes on quality casings typically provide excellent appearance without additional work, but exposed fastener locations, minor gaps at joints, and wall intersections may require attention. Color-matched wood filler applied to fastener holes disappears when properly tooled and finished. Select filler that matches the beam finish exactly, and practice application technique on scrap material before working on visible surfaces.
Joint treatment between beam casings and perpendicular elements requires careful consideration. Where casings meet walls, a small gap typically remains due to wall surface irregularities. This gap should be caulked rather than left exposed, using paintable latex caulk that matches the wall or beam finish as appropriate. In ceiling applications, a thin reveal gap often appears more sophisticated than a tight joint, acknowledging the inherent imprecision of construction rather than pretending perfection exists. This aesthetic choice depends on overall design intent and should be consistent throughout the installation.
End grain treatment at beam terminations—whether at walls, perpendicular beams, or other intersections—deserves attention in visible installations. Exposed polyurethane end grain differs subtly in appearance from longitudinal surfaces due to different fiber orientations in the mold. Premium manufacturers address this by designing casings that terminate at walls or behind trim elements where possible. Where end grain remains visible, careful paint or stain application can minimize the contrast, or the design can incorporate trim pieces that cover the junction.
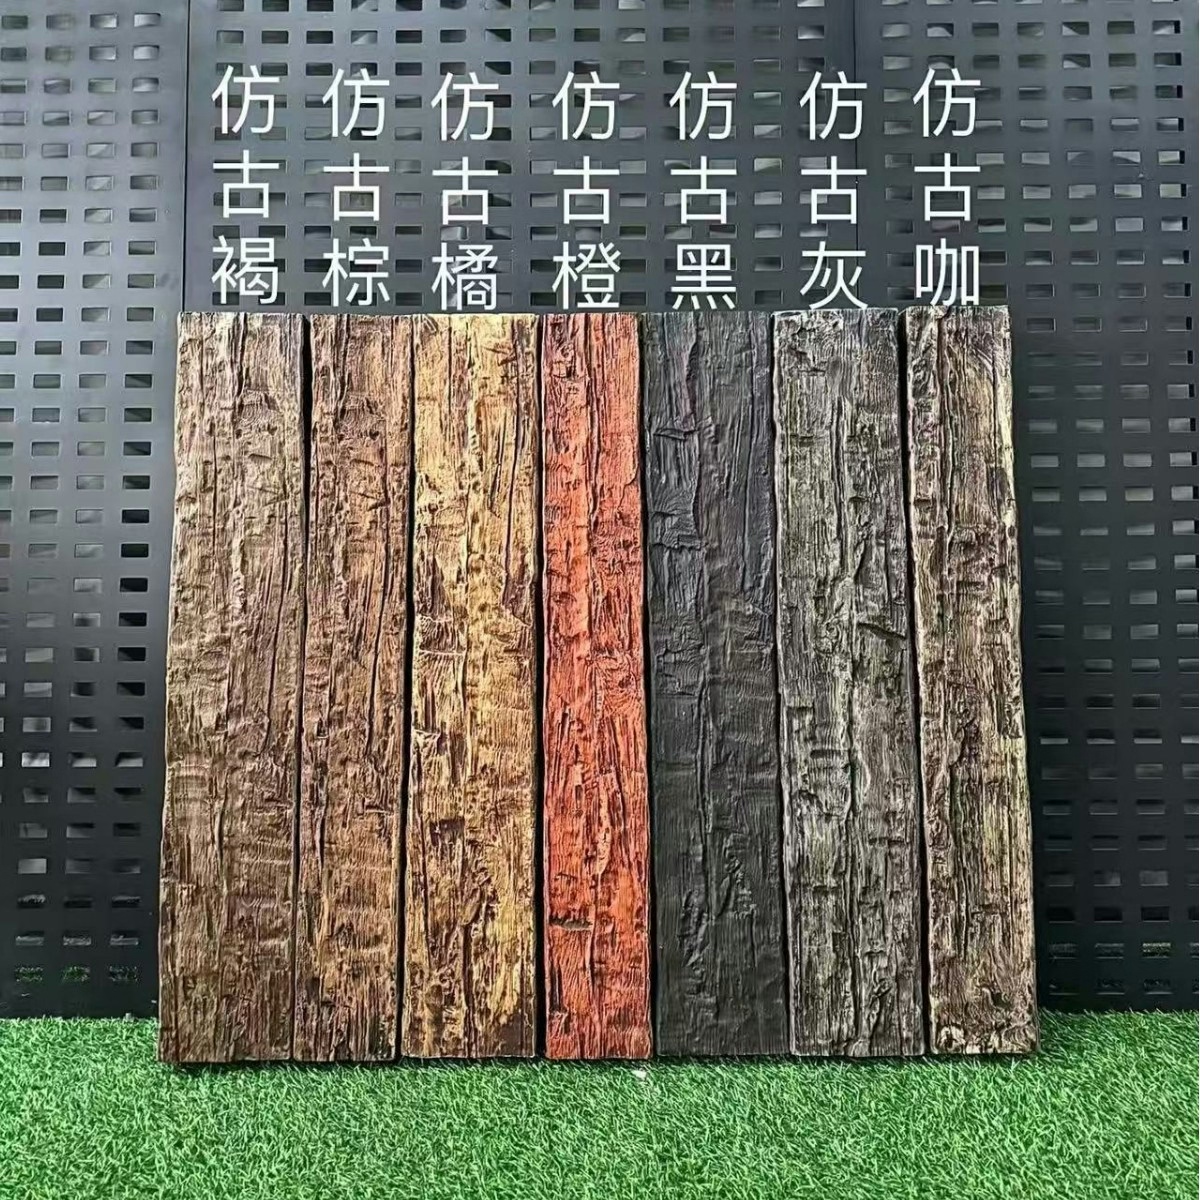
Long-Term Care and Performance Expectations
Three-sided PU resin casings require minimal ongoing maintenance compared to natural wood alternatives. Unlike genuine timber that may require periodic refinishing, repair of splits or cracks, or treatment for insect damage, polyurethane casings maintain their appearance with basic cleaning. An occasional dusting with a soft cloth or gentle vacuuming with a brush attachment removes accumulated debris without risk of surface damage.
Inspections should occur periodically—annually at minimum—to verify that casings remain securely attached and undamaged. Check for any gaps between casings and underlying beams, particularly at beam ends where moisture intrusion might eventually compromise either the existing structure or adhesive bond. Address any separation promptly by re-adhering with appropriate construction adhesive. Catching these issues early prevents more extensive repairs later and maintains the visual integrity of the installation.
Should damage occur—whether from accidental impact, furniture movement, or unusual circumstances—repairing PU resin casings differs from repairing natural wood. Unlike timber that can be patched, sanded, and refinished, damaged polyurethane typically requires panel replacement rather than localized repair. For this reason, ordering spare sections during initial installation provides a practical hedge against future damage. Premium suppliers maintain patterns for discontinued products, but sourcing exact matches years later cannot be guaranteed.
Technical References
ASTM standards cited in every specification
Test Data
Lab results from internal testing program
Updated 2026
Reviewed against current product specs


