
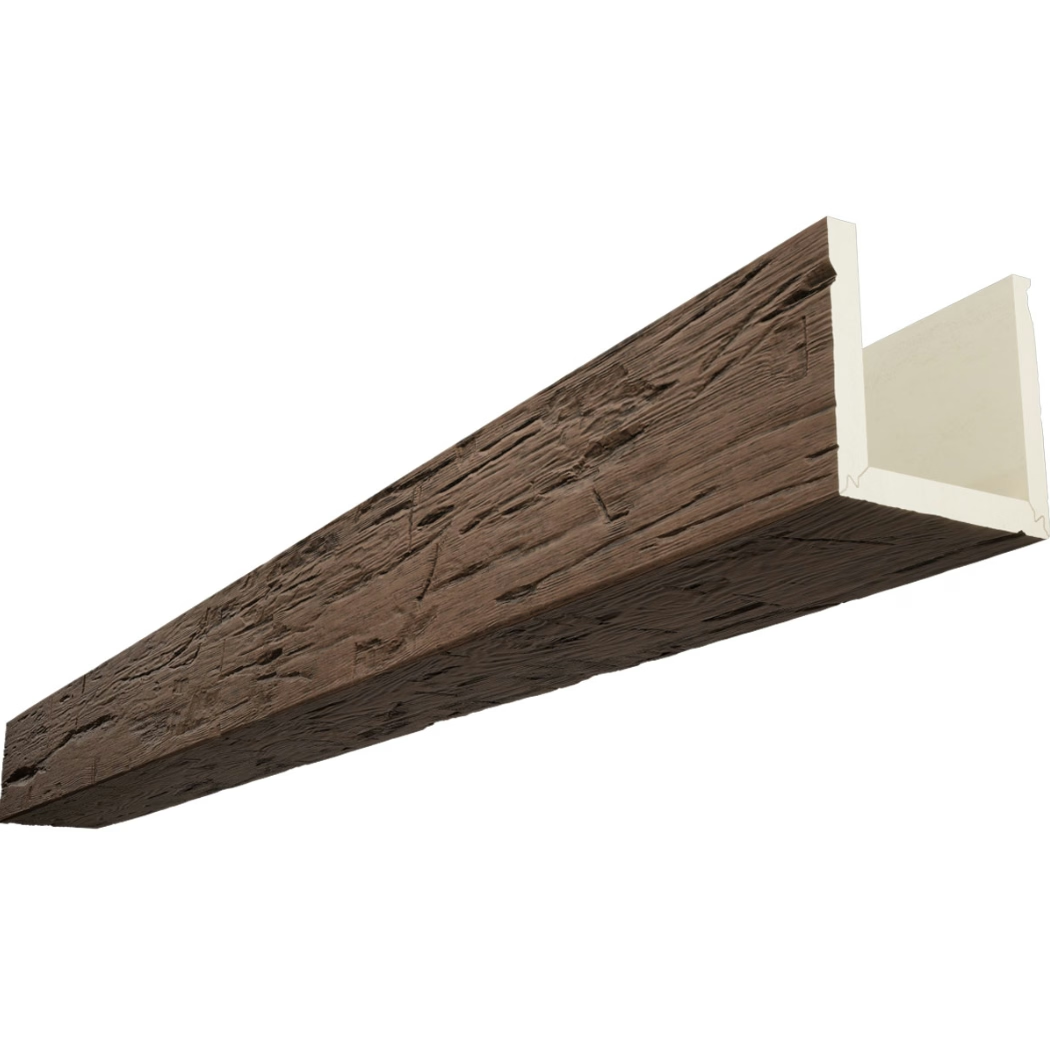
Every home contains at least one beam that never received the design attention it deserved—a steel I-beam in the great room, a lam beam spanning the basement, or engineered joists exposed in a converted attic space. These structural necessities interrupt design intentions, creating visual obstacles that designers work around rather than embrace. U-shaped polyurethane faux wood beams offer comprehensive renovation solutions, transforming problematic beams into architectural assets that enhance rather than compromise interior environments.
Assessing Your Beam Renovation Opportunities
Successful beam renovation begins with thorough assessment of existing conditions and renovation objectives. Not every beam requires identical treatment, and understanding what each beam presents helps establish appropriate renovation approaches. Some beams need complete concealment, while others benefit from partial treatment that preserves some original character while adding new qualities.
Structural beam evaluation confirms that wrapping will not interfere with building function. Verify that existing beams carry necessary loads and that wrapping will not restrict movement, ventilation, or access that building systems require. Steel beams in particular may have fireproofing requirements that covering could compromise—understanding these requirements before renovation prevents code compliance issues.
Dimension measurement requires precision, as successful wrapping depends on accurate information about beam sizes. Measure width, depth, and length of existing beams, noting any variations along spans. Irregular beam dimensions may require custom fabrication or creative installation approaches that differ from standard product applications.
Environmental condition assessment identifies factors that might affect renovation success. Moisture sources, temperature extremes, and other environmental factors influence material selection and installation approach. Beams in challenging environments require products and techniques designed for those conditions rather than standard approaches that might fail prematurely.
Planning the Renovation Approach
Scope definition establishes what the renovation will accomplish—not merely cosmetic improvement but comprehensive transformation. Consider how renovated beams will integrate with overall interior design, how they will coordinate with lighting and other design elements, and what finishes will achieve intended appearances. Clear scope definition guides specification and installation decisions throughout the project.
Budget development accounts for all renovation costs, not merely product purchases. Labor, finishing materials, lighting integration, and contingency reserves all factor into realistic budgets. Underestimating renovation costs frequently leads to value-engineering compromises that diminish outcomes—thorough budget development prevents these disappointments.
Timeline establishment coordinates renovation activities with other project constraints. How long can the space be disrupted? Are there events or occasions that require completion by specific dates? What other renovation activities must sequence with beam work? Understanding these constraints shapes realistic expectations and enables appropriate scheduling.
Material specification selects products appropriate for renovation scope and objectives. U-shaped polyurethane beams offer various profiles, finishes, and quality levels—selecting among these options requires matching product characteristics to project requirements. Premium products offer superior aesthetics and durability, while adequate alternatives may serve budget-constrained projects acceptably.

Installation Process and Techniques
Site preparation creates conditions that enable successful installation. Existing beams should be clean, dry, and free from materials that might interfere with adhesive bonding. Loose paint, rust scale, and accumulated dirt all require removal before mounting begins. This preparation investment prevents installation failures that would require correction.
Dry fit verification confirms that components will fit properly before adhesive application. Positioning beams temporarily, checking dimensions, and identifying any adjustments needed prevents problems once adhesive gets applied. Dry fitting also reveals whether products meet expectations upon close inspection, allowing returns or exchanges before irreversible installation.
Adhesive application follows manufacturer specifications precisely, as improper application compromises bond strength and longevity. Apply adhesive in appropriate patterns and quantities, allowing proper open time before positioning components. Temperature and humidity conditions affect adhesive performance—verify that site conditions fall within acceptable ranges.
Positioning and securing U-shaped beams requires attention to alignment and levelness throughout installation. Temporary bracing maintains position during adhesive cure, while checks verify that beams sit properly relative to ceiling plane and adjacent elements. Rushing this phase risks misalignment that proves difficult or impossible to correct once adhesive sets.
Finishing for Professional Results
Seam treatment between beam components and at intersections creates seamless appearances that distinguish professional installations. Quality caulking, careful coloring, and precise application produce joints invisible to casual observation. This attention to detail elevates installations from adequate to excellent, rewarding careful attention with results that appear inherent rather than added.
Painting or staining coordinates beams with overall design schemes. Polyurethane surfaces require appropriate preparation—priming for paint, conditioning for stain—to achieve proper adhesion and appearance. Sample applications on inconspicuous areas verify results before committing to visible surfaces.
Integration with trim and other architectural elements completes renovation visually. Crown molding intersections, light fixture mounting, and other details require coordination that ensures clean transitions between beam elements and adjacent treatments. These integration details often determine how professional final results appear.
Protection during subsequent renovation phases prevents damage to completed beam work. Construction activities can easily damage beam surfaces if not properly protected—temporary covering during painting, drywall work, and other subsequent activities preserves finished appearances until final occupancy.

Integration with Design Elements
Lighting integration transforms beam renovation from purely aesthetic improvement to comprehensive design enhancement. Recessed fixtures positioned in relation to beams create layered illumination that highlights beam details while providing functional light. Pendant fixtures hung from beams establish visual connections between ceiling treatment and furniture groupings.
Color coordination between renovated beams and existing design elements creates visual unity. Matching beam finishes to hardwood floors, wooden furniture, or existing millwork strengthens design coherence throughout spaces. The wood-look appearance of polyurethane beams enables this coordination just as natural wood would.
Furniture arrangement can relate to renovated beams, creating intentional spatial relationships. Beams above seating areas create psychological boundaries without physical barriers. Beams defining kitchen or dining zones establish territories within open floor plans. These spatial relationships enhance both function and appearance.
Accessorizing around beam installations reinforces design direction. Artwork, textiles, and decorative objects can complement beam aesthetics, creating complete environments rather than isolated improvements. The warmth that wood-look beams introduce can extend through accessorizing choices that reinforce organic, natural character.
Long-Term Care and Maintenance
Routine maintenance preserves renovated beam appearances over extended periods. Dust removal, occasional cleaning, and inspection for developing issues maintain appearance without extensive intervention. The polyurethane surface cleans more easily than wood alternatives, avoiding the refinishing requirements that natural materials demand.
Damage prevention minimizes maintenance needs through thoughtful protection. Moving furniture carefully, controlling impact risks, and addressing potential problems early prevents damage that would require repair. This preventive attention extends between maintenance intervals and preserves appearance quality.
Repair techniques address damage when it occurs. Minor scratches can be touched up with appropriate finishing products, while more significant damage may require component replacement. Having spare materials from original installation facilitates repairs without requiring product reorders.
Professional consultation helps navigate maintenance challenges when they arise. Experienced installers and designers can advise on appropriate care techniques and recommend repair approaches for specific issues. This professional support ensures that maintenance activities support rather than compromise long-term appearance.
Technical References
ASTM standards cited in every specification
Test Data
Lab results from internal testing program
Updated 2026
Reviewed against current product specs


