A bathroom is not the first room that comes to mind when thinking about ceiling beams. Kitchens, living rooms, and dining rooms dominate the conversation, and with good reason — they have more ceiling to treat and more design-conscious clients. But bathrooms, and particularly contemporary coastal bathrooms, are emerging as a compelling application for decorative faux beams. The right beam treatment transforms a bathroom from a purely functional space into a destination, adding warmth and character to a room type that is too often treated as purely utilitarian.
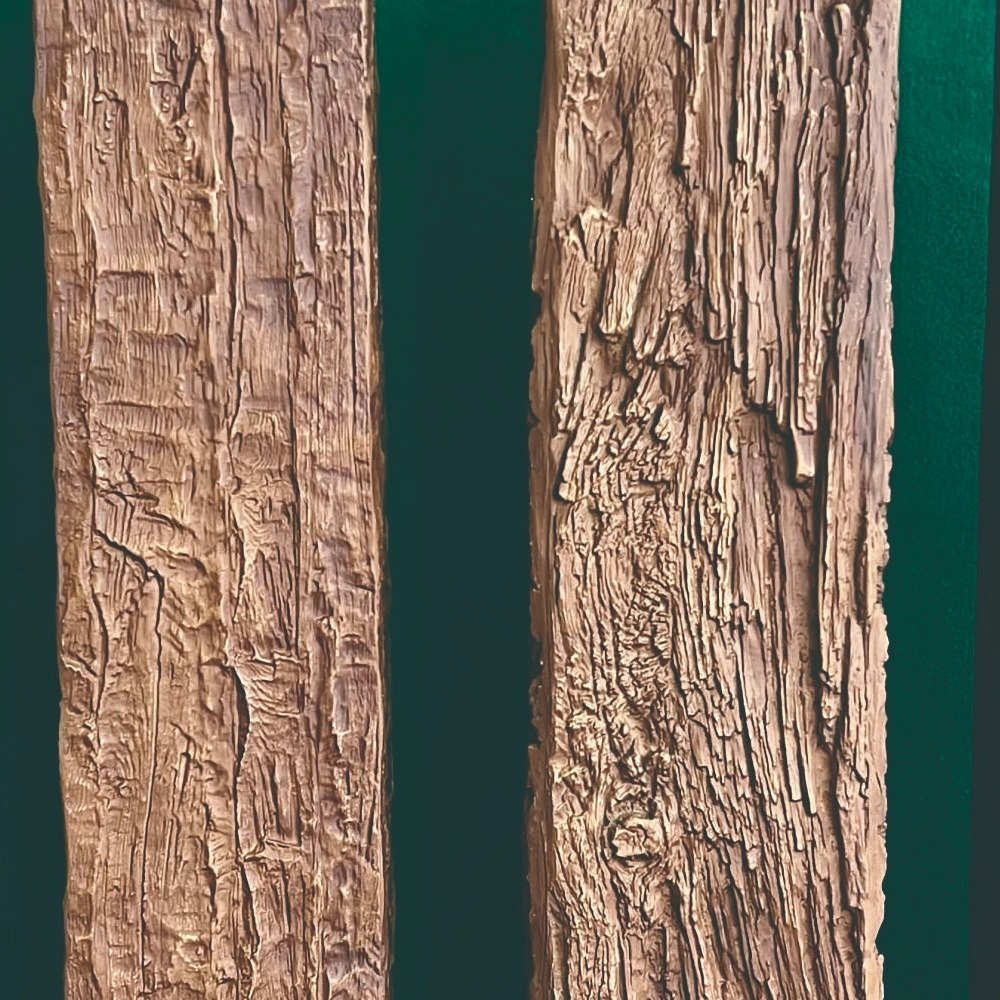
The weathered gray finish is particularly well-suited to the coastal bathroom. It captures the appearance of driftwood — timber that has been softened and silvered by exposure to salt air and sun — in a finish that reads as both natural and sophisticated. This is not the gray of industrial concrete or matte steel. It is a warm, organic gray with subtle tonal variation, the kind of gray that feels like it belongs near the ocean.
Why the Coastal Bathroom Is an Ideal Beam Application
The coastal bathroom aesthetic has evolved significantly over the past decade. What was once a theme expressed through seashell motifs and nautical accessories has matured into a design approach that prioritizes natural materials, muted colors, and a connection to the landscape. In this evolved context, the bathroom ceiling — typically ignored or treated with standard white paint — is an opportunity to bring the same material quality from the rest of the home into a space that has traditionally been designed with purely functional priorities.
Weathered gray faux beams add warmth to a bathroom in a way that most other ceiling treatments cannot. Tile ceilings are cold and institutional. Painted ceilings are generic. Even tongue-and-groove wood paneling on a bathroom ceiling requires maintenance in a humid environment and can develop mold or warping over time. Weathered gray polyurethane beams provide the warmth and texture of wood without the moisture-related vulnerabilities, creating a ceiling that feels as carefully designed as the rest of the bathroom.
Understanding the Weathered Gray Finish
The weathered gray finish is distinct from other gray wood finishes in its texture and tonal variation. Unlike a uniform gray stain applied to new wood, a weathered gray finish suggests the gradual, uneven process of natural weathering. The surface should have areas of different gray intensities — some darker, some lighter, with subtle brown or tan undertones peeking through in places. The texture should feel slightly worn, as if the soft earlywood has been eroded by exposure while the harder latewood remains more prominent.
For polyurethane beams, achieving this look convincingly requires a multi-stage finishing process. The base color is applied uniformly, followed by a darker gray toner in the grain recesses, and a final light gray highlight on the raised surfaces. The result is a finish that looks different from every angle and at every distance — subtle up close, with full character visible from across the room.
The weathered gray finish pairs naturally with the material palette of the contemporary coastal bathroom: white-painted shiplap or plaster walls, natural stone tiles in warm grays and beiges, brushed nickel or matte black fixtures, and natural fiber textiles. The gray beams sit comfortably in this palette without introducing a color that clashes with the white walls or competes with the stone tiles.

Moisture Considerations for Bathroom Installations
Bathrooms present a specific environmental challenge that is worth addressing directly: humidity. Showers, baths, and even hand-washing generate significant amounts of water vapor that accumulates in the room air and condenses on cooler surfaces. Over time, this moisture can affect building materials that are not properly protected.
Polyurethane's moisture resistance is a genuine advantage in bathroom applications. Unlike natural wood, which can absorb moisture and swell, warp, or develop mold, polyurethane does not absorb water. The material is closed-cell and non-porous, meaning moisture cannot penetrate the surface. This makes it inherently suitable for bathroom environments without the need for special sealing or treatment.
That said, a few practical precautions improve the longevity of any bathroom installation. Ensure adequate ventilation through an exhaust fan that runs during and after showers to reduce the humidity level in the room. In bathrooms with limited ventilation or high shower usage, a slightly larger exhaust fan than the standard sizing recommendation is worth the extra investment. Avoid positioning beam joints directly above the shower area, where the highest concentrations of steam occur. And perform the same periodic cleaning routine described in the maintenance guide — wiping the beam surfaces with a soft, damp cloth to remove any accumulated residue from the bathroom's humidity.
Beam Configurations for the Bathroom
The Single Beam Above the Vanity
The smallest and most restrained bathroom beam application is a single beam installed above the vanity or primary mirror. This placement adds warmth and character to the wall that is most frequently in view when using the bathroom, while keeping the treatment minimal enough to suit smaller bathroom ceilings. A six-inch-wide beam in a weathered gray finish, spanning the width of the vanity, creates a strong visual anchor without overwhelming a compact space.
Full Bathroom Ceiling Treatment
For larger bathrooms — master baths, spa bathrooms, or bathrooms with vaulted ceilings — a more complete beam treatment becomes appropriate. A pair of parallel beams running across the bathroom ceiling, combined with a single beam running perpendicular at the center, creates a grid pattern that provides full coverage without the visual heaviness of multiple solid beams. The weathered gray finish keeps the treatment feeling light and relaxed rather than heavy or country-specific.
Above the Bath
In a bathroom with a freestanding soaking tub, a beam treatment above the tub creates a focal point and a sense of shelter that enhances the bathing experience. The beam should be positioned to span the area directly above the tub, creating a visual canopy that frames the tub as the primary element of the room. In this placement, the weathered gray finish echoes the color of the surrounding stone or tile while adding the warmth and texture that stone alone cannot provide.
Complementing the Beams with Bathroom Materials
The weathered gray beam ceiling should feel like one element of a coordinated material palette rather than a standalone decoration. White-painted walls — whether smooth plaster or tongue-and-groove shiplap — provide the cleanest possible backdrop for gray beams. The combination of white walls and gray beams creates a light, airy bathroom aesthetic that is the defining look of contemporary coastal design.
Stone tiles in warm grays, beiges, or off-whites complement the beam finish without matching it directly. A stone accent wall behind the tub or in the shower niche introduces texture that relates to the beam surface while maintaining the restrained color palette. Large-format stone tiles in a matte finish work better with weathered gray beams than highly polished tiles, which introduce a level of formality that contradicts the relaxed coastal aesthetic.
Fixtures and hardware should be selected with the beam finish in mind. Brushed nickel and matte black are the two most common finishes in contemporary coastal bathrooms, and both work well with weathered gray beams. Brushed nickel has a cooler, more contemporary feel, while matte black is slightly more dramatic and pairs well with industrial-influenced coastal designs. Avoid polished chrome or gold fixtures, which introduce a level of formality and shininess that feels out of place next to the soft, matte texture of weathered gray beams.

Lighting the Bathroom with Beam Ceilings
Bathroom lighting must address practical grooming tasks — applying makeup, shaving, dental care — while also contributing to the overall atmosphere of the space. The weathered gray beam ceiling adds warmth that helps balance the clinical brightness often associated with bathroom lighting, creating a more relaxed environment for long soaks and morning routines.
Recessed downlights positioned to avoid the beams provide general illumination for grooming tasks. Wall-mounted vanity lights on either side of the mirror provide the directional task lighting that is most flattering for personal grooming. For atmosphere, consider a small pendant or two flanking the mirror, in a natural material such as rattan or woven seagrass, which adds warmth and a connection to the coastal aesthetic without competing with the beam ceiling.
For bathrooms with vaulted ceilings and weathered gray beams, consider installing small LED puck lights in the ceiling plane aimed at the beam surfaces. This creates a subtle uplighting effect that highlights the beam texture and adds depth to the vaulted ceiling. The effect is particularly effective in the evening, when the bathroom becomes a space for relaxation rather than routine.
Trade Positioning for the Bathroom Segment
The bathroom application is an emerging market for faux beam products, and trade buyers who recognize this opportunity early can establish a competitive advantage. Marketing weathered gray beams specifically for bathroom applications — with photography showing the beams in context with white walls, natural stone, and brushed nickel fixtures — reaches a design-conscious customer base that is actively looking for ways to elevate their bathroom environments.
Emphasize the moisture resistance and low maintenance of polyurethane beams in bathroom marketing materials. These practical advantages are particularly compelling for this application, where real wood beams would require careful sealing and ongoing maintenance to withstand the humid environment.
Technical References
ASTM standards cited in every specification
Test Data
Lab results from internal testing program
Updated 2026
Reviewed against current product specs


