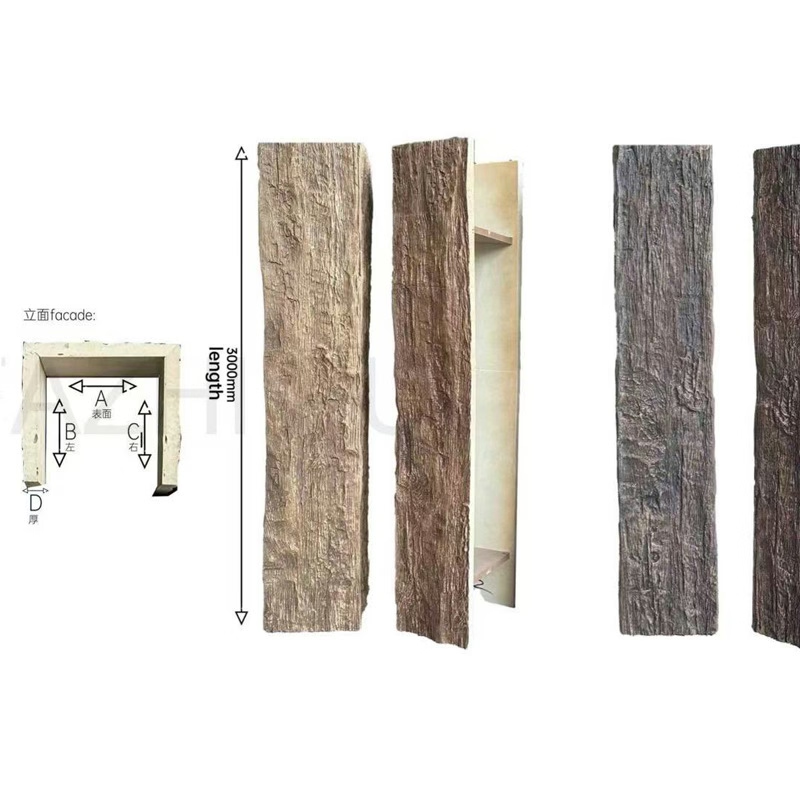
There is a particular satisfaction that comes from finishing a beam on Saturday morning and seeing it installed on the ceiling by lunch. Polyurethane faux wood beams are one of the few architectural elements where a determined DIYer can actually deliver a result that rivals a professional install — provided the planning is done properly first.
This article is written for the homeowner or small contractor who wants to do the work themselves but still wants a result that holds up to scrutiny five years down the line.
What makes PU beams DIY-friendly
Three properties matter most for the home installer. The first is weight. A 3-meter-long, 200-millimeter-by-200-millimeter hollow polyurethane beam weighs between 4 and 6 kilograms — about one-tenth the weight of a comparable solid oak beam. That single difference changes the install from a three-person lift with mechanical help into a two-person job with a couple of ladders.
The second property is finish acceptance. The factory ships the beam with a smooth primed face that accepts latex, acrylic, alkyd, and most specialty coatings without primer changes. For a DIYer who wants a specific color or a layered glaze, that flexibility removes the usual anxiety about whether the coating will bond.
The third property is forgiveness in cutting. Standard timber tools cut PU cleanly: a fine-tooth handsaw, a circular saw with a laminate blade, or a jigsaw with a medium-grit blade all produce a workable edge. Internal blocking can be installed through the cavity for joining or end-cap work, and a little filler plus sanding brings the cut edge back to factory appearance.

Measuring and ordering without drama
The single biggest mistake we see DIYers make is measuring the run along the ceiling and assuming the beam will arrive in one piece. Long pieces do ship as one section, but freight carriers and stairwells have opinions about 4-meter lengths. Measure twice: once along the ceiling at the actual install line, and once along the path the beam will travel from the delivery truck into the room. The shorter of those two numbers dictates the longest section you can order.
A second common error is forgetting to account for the return at each end. A beam that finishes flush to the wall looks unfinished; a beam that returns 100 to 150 millimeters into the wall reads as built-in. Order length accordingly and plan the return cuts before you start.
For a typical living-room project with a 5.4-meter span, a sensible order is two 2.7-meter sections plus a factory-prepared splice plate that hides the central joint. Splice plates are foam-filled scrim pieces glued over the joint and finished in the same coat, so the seam disappears under the paint.

Mounting options for the home installer
Three mounting methods cover the vast majority of DIY installs.
- Surface mounting on cleats — the simplest and most reversible. A pair of painted timber cleats screwed into the ceiling framing carry the beam. The beam lifts over the cleats and is glued or screwed from the inside through pre-drilled pilot holes. This method works on plasterboard ceilings where the framing can be located with a stud finder, and it leaves no major patching if the beam is ever removed.
- Recessed mounting between ceiling joists — for the homeowner who wants a flush-to-ceiling look. The drywall is cut back between two joists, blocking is installed across the bay, and the beam slides into the recess and is screwed through the side into the blocking. This produces a beautiful reveal but requires more ceiling work and is harder to undo later.
- Box-beam construction around a structural member — for houses where a real steel I-beam or glulam is already exposed. The PU beam is built as a U-shaped wrap that clicks around the structural member and is glued and pinned along its length. This is the classic way to dress an existing structural beam without removing it.
For the first-time DIYer, the cleat method is the right starting point. It is forgiving, it allows the beam to be removed without major repair, and it can be completed with a drill, a level, a saw, and a caulking gun.
Finishing techniques that elevate the result
A paintable beam is a blank canvas, and the finishing step is where the personality of the project is set. A few techniques consistently produce results that read as custom rather than catalog.
- Two-tone base coat plus glaze. Lay down a solid base color, then wipe or rag a darker glaze along the grain direction to imitate the variation of real timber. Seal with a satin or matte clear coat for durability. The technique looks harder than it is.
- Dry-brushed highlight. With a nearly dry brush and a lighter shade, drag the tips of the bristles along the raised grain ridges to catch the highlights. This produces a very convincing freshly-planed look that photographs beautifully.
- Tape-and-paint reveals. If the design calls for a painted black soffit or a metallic inlay, use low-tack painter's tape and a foam roller for crisp lines. PU accepts tape cleanly when the base coat has fully cured.
- Ceruse or limewash. A thinned white glaze wiped across a darker base mimics the European farmhouse look. Practice on the offcut from your splice plate before touching the visible face.
Plan on three coats minimum for a finished beam: primer (factory-applied, but a light scuff-sand helps the topcoat bite), color coat, and protective clear. Allow the recommended cure time between coats — rushing this step is the single most common reason DIY finishes fail.

What to keep in mind before you start
A paintable PU beam is more forgiving than solid timber, but it is not magic. Direct sunlight through a south-facing clerestory window will fade any painted finish over time; specify a UV-resistant clear coat if the beam will sit in that exposure. Kitchens produce grease aerosols that bond to matte finishes; a satin or semi-gloss clear coat cleans more easily. Bathrooms and steam rooms need a moisture-resistant sealer schedule from day one.
If the ceiling has sprinklers, code requires the sprinkler head to remain exposed and functional. The beam cannot cover or redirect a sprinkler head; design the layout to step around the heads, not over them. The same logic applies to smoke detectors and recessed lighting — plan the beam run to accommodate these services before ordering.
One last note. DIY finishing is enjoyable, but a 4-meter beam on a pair of sawhorses will collect dust, pet hair, and the occasional curious toddler fingerprint. Keep the finishing area clean, lay a drop cloth, and resist the urge to speed the cure with a heater — high heat can cause solvent-based coats to flash off unevenly. Take your time, follow the coat-and-cure schedule on the can, and the result will look like a professional install when it goes up on the ceiling.
Technical References
ASTM standards cited in every specification
Test Data
Lab results from internal testing program
Updated 2026
Reviewed against current product specs