A full-scale home remodel represents one of the most significant investments a property owner can make. Unlike room-by-room improvements that address individual problems incrementally, a comprehensive remodel transforms an entire dwelling simultaneously — creating coherent living environments where every space relates purposefully to every other. The scale of the investment demands comparable ambition in design quality, and the coordination required to achieve it demands materials that perform consistently across wildly different spatial conditions.
Ceiling treatments illustrate this challenge with particular clarity. A kitchen ceiling must accommodate extraction hood venting, under-cabinet lighting, and the humidity fluctuations of cooking. A bedroom ceiling needs to coordinate with blackout blind channels and pendant light positioning. A bathroom ceiling must tolerate steam and temperature variation without deteriorating. A living room ceiling, finally, should create the atmospheric anchor around which the entire social space organises itself. Standardising on a single ceiling solution that addresses all these requirements demands a material capable of remarkable versatility.
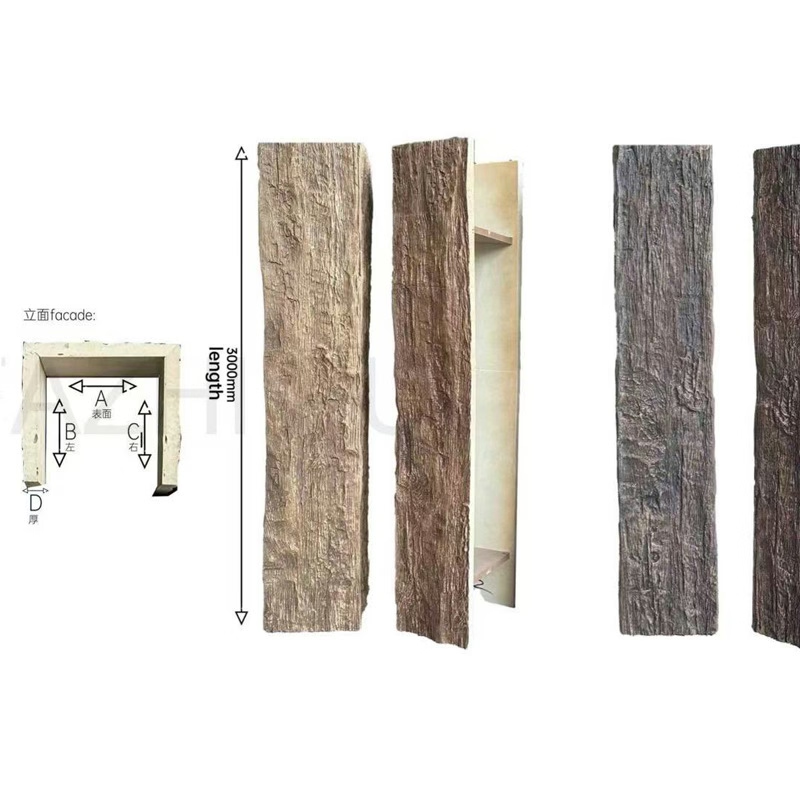
PU faux beams meet this challenge through a combination of performance characteristics that make them uniquely suitable for whole-property specification. Understanding how to deploy them effectively across a remodel project enables the kind of cohesive design language that distinguishes genuinely transformed homes from partially renovated ones.
Establishing a Unified Design Framework
The first decision in a whole-home beam specification concerns the degree of uniformity versus variation across different rooms. This choice has implications for budget, procurement, installation scheduling, and long-term visual coherence.
A unified approach specifies identical beam profiles, finishes, and installation configurations throughout the property. Every ceiling receives the same treatment, creating immediate visual continuity as you move from room to room. This approach simplifies procurement and enables consistent installation methodology across the project. The result reads as a deliberate design choice — the home as a curated whole rather than a collection of individually decorated spaces.
A graduated approach introduces variation while maintaining overall coherence. The principal living spaces receive the most elaborate beam treatments — perhaps cross-beam configurations or cofferred ceilings in the main reception rooms. Secondary spaces receive simpler single-direction installations or decorative beam accents. Utility rooms and transition spaces may incorporate beams in a more restrained manner. The result reads as a hierarchy of spaces, with the beam installation communicating the relative importance of each room.
A fully varied approach responds to the distinct character of each space without attempting overall uniformity. Kitchen beams relate to the cabinetry and worktop materials; bedroom beams coordinate with the headboard and wardrobe finishes; bathroom beams respond to tile and sanitaryware colours. This approach maximises individual room quality but risks fragmentation if the connecting threads between spaces are not explicitly managed.
Coordinating Beams with Other Major Renovations
Whole-home remodeling typically involves simultaneous work on multiple building systems — structural alterations, rewiring, replumbing, insulation upgrades, and finishes all proceed concurrently. Beam installation must coordinate with these parallel workstreams in ways that respect sequencing requirements and protect the finished product.
Electrical work should be substantially complete before beam installation begins. Running cables through the ceiling void, positioning junction boxes, and installing any recessed downlight housings that will be integrated with the beam system must all be finished before beams are fixed. Installing beams over exposed electrical work risks damaging cable runs and creates access difficulties that complicate subsequent electrical modifications.
Insulation upgrades frequently affect ceiling void conditions in ways that impact beam installation. Sprayed foam insulation, in particular, fills ceiling voids completely, eliminating the access routes and fixing opportunities that conventional beam mounting depends on. Where spray foam is specified, beams must be installed before the insulation application — or alternative mounting methods that do not require ceiling void access must be designed from the outset.
Plumbing modifications affecting ceiling-level pipework require similar advance resolution. Soil stacks, vent pipes, and water distribution routes that penetrate ceiling planes need to be relocated, enclosed, or coordinated with beam positioning before installation commences. Any pipework passing behind or through beam positions will be inaccessible after installation, making pre-installation resolution essential.

Room-by-Room Specification Strategy
With the overall framework established and parallel workstreams coordinated, the detailed specification of beams in each room can proceed with confidence.
Open-plan ground floor layouts — combining kitchen, dining, and living functions in a single generous space — represent the most demanding and rewarding beam applications in residential remodelling. The scale of these spaces justifies substantial beam investment, and the visibility of the ceiling from multiple functional zones demands a treatment that contributes positively throughout the day and across different uses.
A single-direction beam installation in a large open-plan space provides directional emphasis that helps organise the otherwise undifferentiated floor plan. Beams running parallel to the kitchen run, for example, visually reinforce the kitchen's working axis while creating an overhead rhythm that carries through the dining and living zones. The result is an open-plan space that feels organised rather than chaotic.
Vaulted and exposed-roof configurations in remodelled lofts and single-storey extensions offer opportunities for beam installations that engage directly with the structural roof geometry. Installing beams that echo the roof pitch — running parallel to rafters or crossing between purlins — reinforces the architectural expression of the structure rather than concealing it. These installations read as honest declarations of how the building is made, connecting occupants to the craft of construction.
Bedroom ceiling beams should respond to the orientation of the room and the positioning of the bed. Beams running across the shorter dimension of a rectangular bedroom visually widen the space — helpful in narrow rooms where width feels constrained. Beams running across the longer dimension create a sense of depth that works well in square or near-square bedroom proportions. The bed headwall provides a natural anchor point for the beam composition; treating the ceiling above the bed as the focal area generates a sense of intimacy that enhances the room's primary function.
Bathroom and wet-room beam applications require specific attention to moisture exposure. While polyurethane tolerates humidity without deterioration, the aesthetic outcome depends on appropriate ventilation provision and the specification of suitable finishes. High-gloss or satin-finish coatings resist moisture penetration more effectively than matte textured finishes. Where beams are positioned above shower zones, additional ventilation capacity should be specified to manage the elevated humidity levels that these areas generate.
Transition Detailing Between Spaces
Whole-home beam installations create transition points where the beam treatment in one room meets a different treatment in an adjacent space. These junctions deserve explicit design attention because they communicate the boundary between rooms and establish the quality of finish throughout the property.
Where beam ceilings meet non-beam ceilings — at bedroom doorways, for example — a clean transition detail prevents the beam treatment from appearing unfinished or abruptly terminated. Shadow-gap reveals, thin metal trim strips, and painted architrave profiles each provide appropriate termination depending on the overall design aesthetic. The detail should feel resolved rather than improvised.
At open-plan transitions where beam treatments flow between adjacent functional zones without physical barriers, the design challenge shifts to managing the visual relationship between different beam configurations. A single-direction beam arrangement in a kitchen that extends into a cross-beam arrangement in the adjacent dining room requires a transition zone where the two configurations interlock gracefully. Staggering the intersection, maintaining consistent beam depth, and aligning beam soffit heights across the transition all contribute to a successful visual resolution.

Budget Allocation Across the Project
A whole-home remodel typically operates within a defined budget that must be allocated across all the workstreams demanding investment. Beams represent one budget line among many — important to the overall aesthetic outcome but not immune from the financial discipline that responsible project management requires.
Calculating the beam budget begins with measuring the ceiling areas to be treated and establishing the beam linear metreage required for the specified configuration. Multiplying linear metreage by the per-metre product cost produces a material cost figure to which delivery, fixings, finishing products, and installation labour must be added.
Allocating a contingency within the beam budget — typically fifteen to twenty percent — provides headroom for unforeseen requirements, minor specification adjustments, and any additional elements that emerge during the design development phase. A contingency prevents the beam installation from becoming the project constraint when other costs exceed early estimates.
Value engineering options exist for projects where the initial beam budget proves unsustainable. Reducing beam depth while maintaining the same installation configuration reduces material costs without fundamentally altering the visual result. Simplifying the beam configuration from cross-beams to single-direction reduces both material quantity and installation labour. Selecting standard rather than custom finishes brings costs back toward catalogue ranges. Each adjustment should be evaluated against its impact on the overall design quality before commitment.
Achieving Completion and Quality Assurance
The final phase of a whole-home beam installation involves inspection, correction, and approval — confirming that the installed work meets the quality standards established during design and specification.
Visual inspection should assess the overall impression of the installation, the quality of joints and intersections, the consistency of finish across all beam surfaces, and the cleanliness of adjacent surfaces that may have been affected by installation work. Photographs taken from multiple angles and heights provide a comprehensive record that can be compared against design intentions.
Fixing security should be verified through physical inspection — checking that all brackets are properly tightened, that adhesive-fixed elements show no signs of separation, and that no unusual movement is detectable when beams are subjected to gentle pressure. Any fixing deficiencies identified should be remedied before the project is considered complete.
The completed installation should be handed over with documentation including product specifications, fixing methods employed, recommended maintenance procedures, and contact details for the supplier and installer. This information enables future maintenance, modification, or extension of the beam system without reliance on institutional memory or guesswork.
Technical References
ASTM standards cited in every specification
Test Data
Lab results from internal testing program
Updated 2026
Reviewed against current product specs