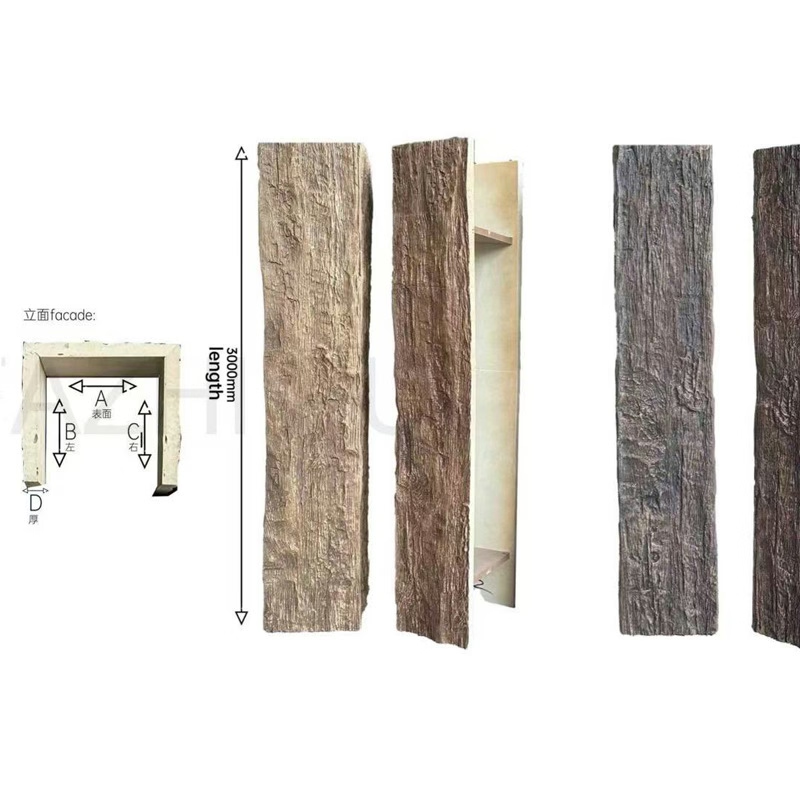
The home improvement retail experience in America has transformed how homeowners approach renovation projects. Big-box stores like Lowe's and Home Depot have democratized access to building materials, enabling DIY enthusiasts to tackle projects that previously required contractor involvement. For ceiling beam installation, this accessibility means that homeowners can achieve professional-looking results without professional budgets or specialized skills. Understanding what makes retail-style beams accessible helps DIYers select products and approaches that deliver satisfying outcomes.
The retail approach to ceiling beams emphasizes several characteristics that distinguish these products from commercial or custom alternatives. Affordability comes from standardized manufacturing and simplified distribution. Ease of installation follows from weight reduction and user-friendly mounting systems. Quality appearance ensures that finished installations look professional rather than amateurish. These characteristics combine to make beam installation achievable for homeowners across skill levels and budget constraints.
Understanding Retail Beam Products
Mass-market ceiling beam products sold through home improvement retailers differ in several ways from commercial or custom alternatives.
Standardized sizing simplifies product selection by offering predictable dimensions that fit typical residential applications. Rather than specifying custom dimensions, homeowners choose from established size options that manufacturers produce efficiently. This standardization reduces cost while ensuring that basic installation requirements are satisfied.
Simplified packaging enables retail distribution through stores and shipping networks designed for consumer products rather than commercial freight. Products arrive ready for pickup or delivery without special handling requirements. This accessibility eliminates the commercial ordering processes that might overwhelm individual buyers.
Weight optimization for retail beams emphasizes handlability by single individuals. While professional installers might work with heavier commercial products, retail beams are engineered for the physical capabilities of individual homeowners working with basic equipment.
Mounting simplicity follows from designing products for amateur installation. Rather than requiring specialized hardware or engineering knowledge, retail beams often use standard construction adhesive and common fasteners that homeowners already own or can purchase easily.
Budget Planning for DIY Beam Projects
Successful DIY projects start with accurate budget planning that accounts for all necessary components and potential complications.
Material costs for retail beams typically range from $30 to $150 per beam depending on size, style, and finish quality. A typical living room installation using six to eight beams might require $200 to $1,000 in materials. Understanding these ranges helps set realistic expectations.
Tool requirements for beam installation typically include basic carpentry tools that most homeowners already possess. Tape measure, level, drill or driver, saw (if cutting is needed), and safety equipment form the basic toolkit. Additional specialized tools might improve results but aren't required for successful installation.
Hardware and adhesive costs add to beam purchase prices. Construction adhesive, mounting screws, and any additional mounting materials typically add 10-20% to material costs. These smaller purchases are easy to overlook during budgeting.
Finish touch-up materials ensure that cut ends and mounting points blend with beam surfaces. Matching stain, sealer, or paint for minor repairs might be necessary depending on installation approach.

Installation Approach for Beginners
DIY beam installation follows systematic approaches that help beginners achieve professional-quality results.
Planning before purchase prevents mistakes that waste materials and money. Measuring ceiling dimensions, sketching beam positioning, and calculating material requirements ensure that purchases match project needs. Bringing measurements to the store or including them in online orders helps select appropriate quantities.
Surface preparation ensures that mounting surfaces accept adhesive and fasteners properly. Cleaning ceiling surfaces, removing debris, and ensuring adequate dryness creates conditions for secure bonding. Some surfaces might require priming or additional preparation.
Dry fitting before adhesive application verifies that beams will position correctly before committing to permanent mounting. Small adjustments during dry fitting prevent problems after adhesive sets. Some installers mark beam positions with painter's tape during dry fitting.
Adhesive application according to manufacturer instructions ensures proper bonding. Using adequate adhesive in appropriate patterns prevents failures that might occur with insufficient coverage. Following open time requirements prevents premature loading that might compromise bonds.
Fastener installation supplements adhesive bonding with mechanical security. Screws driven through mounting flanges into ceiling structure provide immediate holding power while adhesive cures. Spacing and sizing of fasteners affects both security and appearance.
Common DIY Installation Mistakes
Understanding common mistakes helps DIY installers avoid problems that undermine otherwise successful projects.
Insufficient adhesive coverage creates weak bonds that might fail over time. Following manufacturer coverage recommendations ensures adequate bonding strength. Using too little adhesive to save cost creates problems that cost more to repair.
Improper surface preparation prevents good adhesion. Painting, staining, or sealing beams before installation affects adhesive compatibility. Dust, grease, or moisture on mounting surfaces interferes with bonding. Taking time for proper preparation pays dividends in lasting results.
Rushing the adhesive cure time puts stress on bonds before they've achieved full strength. Following cure time recommendations prevents failures that occur when installations are loaded prematurely. Planning for cure time in project schedules prevents tempting shortcuts.
Measurement errors compound through installation, creating alignment problems that become obvious at completion. Double-checking measurements, using consistent measurement points, and verifying before cutting prevents懊悔 that wasted materials create.
Inadequate support during adhesive curing allows beams to shift or fall before bonding completes. Having helpers available or using temporary supports keeps beams in position during critical cure periods.

Room-by-Room Considerations
Different rooms present different challenges and opportunities for DIY beam installation.
Living rooms typically offer the most forgiving conditions for beam installation. Standard ceiling heights, adequate accessibility, and generous dimensions make living room installations manageable for beginners. Starting with living room projects builds skills for more challenging applications.
Kitchens present challenges from grease, humidity, and frequent cleaning. Beam selection should account for these conditions, and mounting positions should avoid direct cooking splatter zones. Kitchen beam installation often benefits from professional consultation despite DIY-friendly product characteristics.
Bedrooms offer excellent opportunities for single-beam accent installations that create focal points without comprehensive ceiling treatment. Lower-risk positioning above beds avoids high-traffic areas where beams might suffer damage. Bedroom installations build confidence for more complex projects.
Basements present specific challenges from moisture, lower ceilings, and often-unfinished conditions. Basement beams might cover pipes or ducts, requiring U-shaped products rather than solid beams. Adequate moisture management ensures that beams remain secure in basement conditions.
Achieving Professional-Quality Results
DIY installations can achieve results comparable to professional work when attention is given to details that distinguish quality installations.
Alignment precision creates the clean appearance that professional installations demonstrate. Using laser levels or string lines ensures that beams mount perfectly straight. Minor alignment errors that might seem insignificant become obvious in finished installations.
Consistent spacing between parallel beams creates the rhythm that makes installations feel intentional. Measuring spacing from consistent reference points ensures that variations don't accumulate. Some installers mark spacing on ceilings before beginning installation.
Clean cuts at beam ends ensure professional appearance when beams must be cut to length. Using sharp saw blades, supporting beams properly during cutting, and sanding cut edges smooth prevents the ragged cuts that amateur work often displays.
Seam treatment where beams meet or overlap affects finished appearance significantly. Careful attention to these details ensures that joints appear as design features rather than installation evidence.
Caulk and touch-up applied where beams meet walls and ceilings fills gaps and creates finished appearance. Using paintable caulk that matches wall colors ensures seamless transitions.
Product Selection Tips
Selecting appropriate retail beams for DIY projects requires attention to factors that affect both installation and appearance.
Finish quality affects how convincing beams appear in completed installations. Higher-quality finishes replicate wood appearance more convincingly while resisting damage during handling and installation. Examining beams in person before purchase helps assess finish quality.
Profile authenticity distinguishes quality beams from budget alternatives. Beams with convincing profiles—appropriate proportions, realistic textures, authentic edge treatments—create better finished results than simplified alternatives.
Weight affects both handling and mounting. Lighter beams install more easily but might require additional support for secure mounting. Balancing weight against handling difficulty helps select appropriate products.
Return policies provide insurance against selection errors. Stores with generous return policies enable trying products without committing permanently. Purchasing beams and returning unused items after installation provides flexibility that rigid purchasing cannot.
Building Skills Through Practice
DIY beam installation develops skills that transfer to future projects while providing satisfying tangible results.
Measurement and marking skills improve with practice, reducing errors and increasing confidence. Early projects might require more checking, while later installations proceed more confidently.
Tool proficiency develops through use, improving speed and quality in subsequent projects. The drill skills, saw techniques, and finishing approaches that beam installation develops transfer to countless other projects.
Design judgment improves as homeowners develop sense of proportion, spacing, and coordination. Early projects might feel uncertain, while later selections become more intuitive.
Problem-solving abilities develop when unexpected challenges arise during installation. Each challenge overcome builds capabilities that serve future projects.
The skills developed through DIY beam installation extend far beyond the specific project, creating capabilities that serve homeowners throughout their homes while building confidence for increasingly ambitious future projects.
Technical References
ASTM standards cited in every specification
Test Data
Lab results from internal testing program
Updated 2026
Reviewed against current product specs