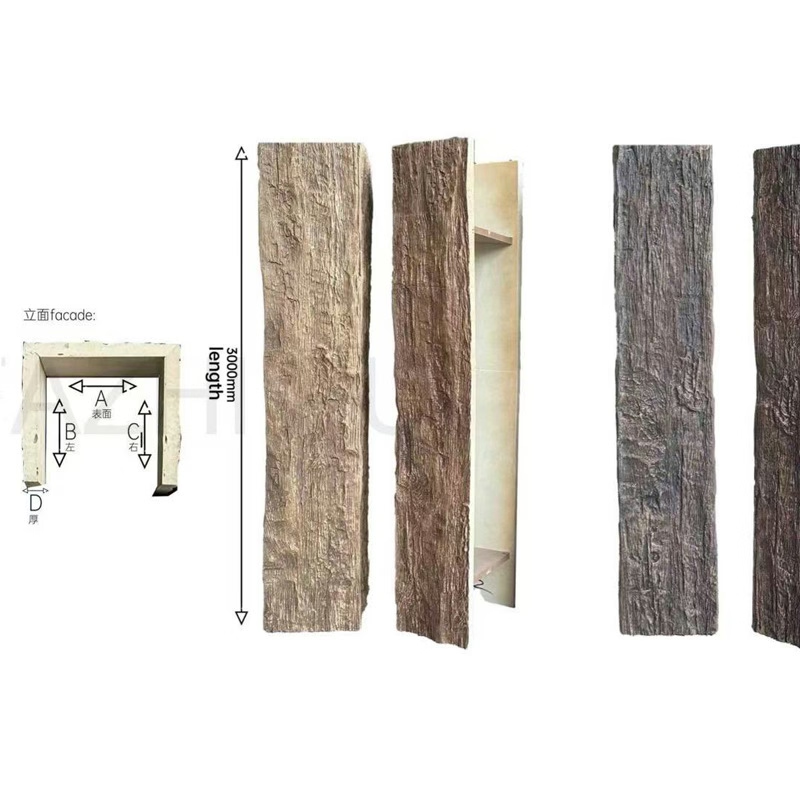
Home improvement enthusiasm continues growing as homeowners discover the satisfaction of transforming their own living spaces. DIY projects offer financial savings alongside the pride of personal accomplishment. Polyurethane faux wood beams represent an ideal material for homeowners ready to tackle ceiling and wall enhancements, combining remarkable visual impact with installation simplicity that accommodates varying skill levels.

The weight advantage of polyurethane beams cannot be overstated for DIY applications. Where genuine timber beams might require two or three people to position safely, a single homeowner can handle polyurethane equivalents comfortably. A twelve-foot beam weighing under twenty pounds positions easily by one person with minimal fatigue, enabling focused attention on alignment and attachment rather than struggling with excessive weight.
Understanding Faux Beam Installation Complexity
Traditional wood beam installation demands carpentry skills that take years to develop. Cutting timber to length requires accurate measurements and specialized equipment. Creating proper joints at corners and intersections demands precision and practice. Finishing raw wood with stains and sealers involves technique and patience developed through experience. Each step presents opportunities for errors that could compromise the final result.
Polyurethane faux beams arrive ready to install with factory-finished surfaces that require no staining or sealing. The material cuts cleanly with standard woodworking tools without splintering or tear-out. Joinery details come molded into the beams, eliminating the need for custom carpentry work. These manufacturing advantages remove the most challenging aspects of wood beam installation, leaving only the straightforward mechanical work of positioning and attachment.
The learning curve for faux beam installation proves remarkably gentle. Most homeowners achieve satisfactory results on their first project after reviewing basic techniques. The forgiving nature of the material accommodates minor measurement errors and alignment adjustments that would prove catastrophic with real timber. Even if imperfect, the result still delivers significant visual improvement compared to the original ceiling condition.
Essential Tools for Homeowner Installation
Basic hand tools handle the majority of faux beam installation requirements. A measuring tape, level, pencil, and screwdriver constitute the minimum toolkit for simple ceiling mounting. These familiar household tools require no special training, making the project accessible to anyone comfortable with basic home maintenance tasks.
Power tools accelerate the process and improve accuracy for those who own them. A circular saw or miter saw makes quick work of length cuts when custom sizing is needed. A drill with appropriate bits speeds anchor installation considerably. A stud finder helps locate ceiling joists for more secure attachment. None of these tools require expertise beyond basic familiarity with their operation.
Safety equipment protects the homeowner throughout the installation process. Safety glasses prevent debris from entering eyes during cutting. Work gloves protect hands during beam handling and hardware installation. A stable ladder or scaffolding system enables safe ceiling access. These modest investments ensure that the project proceeds without injury.
Planning Your DIY Beam Project
Room assessment before purchasing beams prevents unexpected complications during installation. Measure ceiling dimensions accurately, accounting for any obstacles like light fixtures, vents, or ceiling fans that beams must accommodate. Note ceiling height and room proportions to select beam scale appropriate for the space. Small rooms with low ceilings may benefit from smaller beams or wall-mounted alternatives that avoid ceiling height challenges.
Beam selection should consider both aesthetic goals and practical constraints. Larger beams make dramatic statements but require more substantial mounting systems. More intricate profiles add visual interest but may prove more challenging to align perfectly. Beginning installers often achieve best results with simpler, more substantial beams that provide forgiving surfaces and straightforward alignment.
Material quantity calculation requires careful attention to beam lengths and any required cuts. Purchasing slightly longer beams than minimum requirements provides margin for measurement errors and cutting adjustments. Excess material can typically be returned unused if the project completes without requiring the extra length.


Step-by-Step Installation Process
Surface preparation ensures proper adhesion and mounting security. Clean the ceiling surface thoroughly, removing dust, grease, and any loose material that might interfere with adhesive bonding. Mark reference lines with a laser level or chalk line to guide beam alignment across the ceiling. These guide lines prove invaluable during positioning, preventing the gradual drift from straight alignment that can occur when installing beams sequentially.
Dry fitting beams before applying adhesive allows adjustment without time pressure. Position beams according to your reference lines and verify that they align properly and clear any obstacles. Check that beam ends meet cleanly if multiple pieces are needed for long runs. This practice installation identifies potential problems before commitment makes corrections difficult.
Adhesive application follows manufacturer recommendations for the specific product selected. Apply beads continuously along the beam's mounting surface, maintaining appropriate distance from edges to prevent squeeze-out. For beams wider than six inches, additional adhesive near edges ensures complete contact across the full surface. Work methodically without rushing, as adhesive open time provides windows for positioning adjustments.
Mechanical attachment using drywall anchors or joist screws provides security that adhesive alone cannot guarantee. Space anchors according to weight load calculations, typically no more than twenty-four inches apart for ceiling installations. Drive anchors fully until flush with the beam surface without over-tightening, which might compress or damage the polyurethane material.
Finishing Touches and Detailing
Gap filling at beam joints and ceiling intersections creates clean transitions that appear professionally installed. Paintable caulk matching the beam or ceiling color conceals minor imperfections. Apply carefully with a smooth bead, tooling the surface for seamless blending. Small gaps that might appear obvious during daylight often disappear completely in evening lighting, but addressing them proactively ensures satisfaction under all conditions.
Sealing around light fixtures and vents maintains safety and appearance. Gaps between beams and light fixtures create obvious installation evidence that detracts from the finished look. Appropriate trim pieces or strategic positioning of beam layouts can minimize these intersections, but where gaps remain inevitable, clean sealing preserves both appearance and fire safety requirements.
Final inspection examines the completed installation from multiple angles and lighting conditions. View the beams from floor level, from doorways, and under both natural and artificial lighting. Minor adjustments like touch-up caulking or repositioning of hardware covers address any remaining imperfections. Step back periodically during installation to catch drift from planned alignment before it accumulates across multiple beams.
DIY polyurethane faux wood beam installation rewards homeowners with stunning results that transform ordinary rooms into spaces with architectural character. The approachable nature of these materials makes professional-quality outcomes achievable without professional expertise. Weekend projects create lasting improvements that homeowners appreciate every day while taking pride in the accomplishment of completing the work themselves.
Technical References
ASTM standards cited in every specification
Test Data
Lab results from internal testing program
Updated 2026
Reviewed against current product specs